# 6. Design Tenant Registration
# Objective
In this section we will be installing and configuring the Hosting Module and enable the Tenant Registration feature.
At the end of this section, you will be adding the Hosting module to your Orchard project and enabling the Tenant Registration feature. Finally, a website users will be able to select the plan and sign-up for a website by providing their basic information like email and contact details in series of step pages. At the end of the sign-up process user gain access to the app.
Prerequisite
Note, all of Surevelox OrchardCore Modules are dependent on Licensing module and requires that License Management feature is enabled. If you have not already configured Licensing, follow Add License Management section.
# Install Hosting
From workspaceroot navigate to cookbook.web. Using the ".net cli", add nuget package reference for Hosting module.
Run following command to add latest version of the Hosting Module.
cd cookbook.web
dotnet add package Surevelox.OrchardCore.Hosting
2
This will add the package reference to cookbook.web.csproj
# Enable Tenant Registration
Run the cookbook.web application. While Logged in as administrator, go to the admin dashboard. Using the navigate menu go to Configuration > Features. In the search box, type "tenant registration". Next to the Tenant Registration feature, click on Enable button to enable the feature.
Evaluation License
It will also add evaluation license in License Manager for the Tenant Registration feature. Verify that evaluation license is added and it is validated and not expired.
Once enabled, you will see new menu named Multi Tenancy. It will add out-of-the-box Tenant Registration Pages with one step "Finish". It will also add Quick Start Recipes.
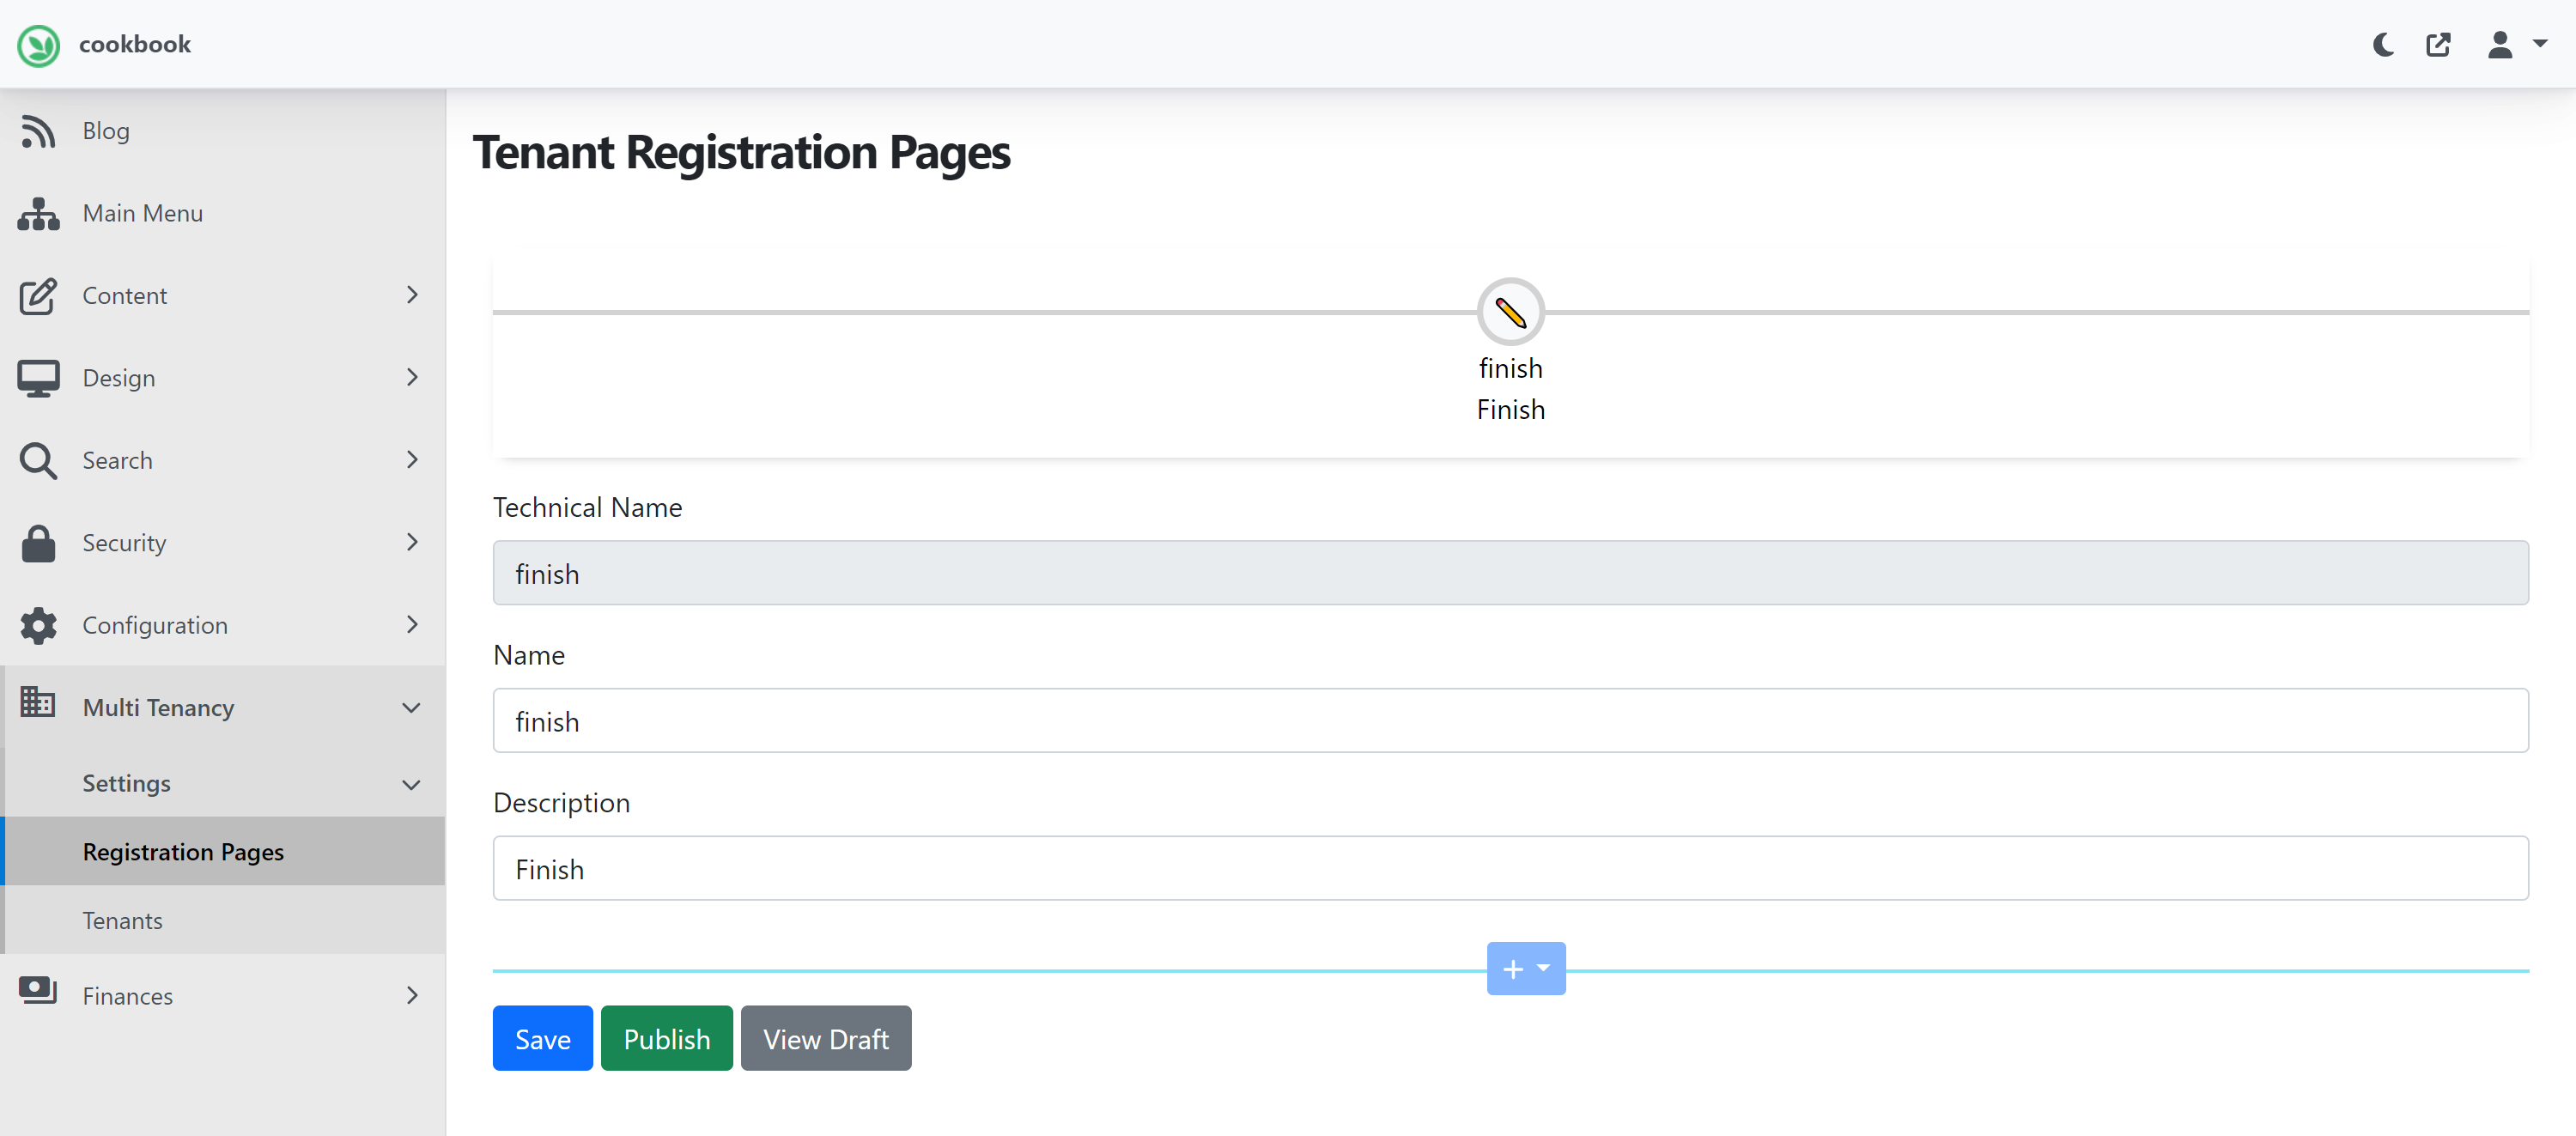
To configure Registration Pages, from the menu navigate to Multi Tenancy > Settings > Registration Pages. Here, the pages and registration flow can be customized.
Lets checkout tenant registration pages available out-of-box. To add out-of-the-box tenant registration flow from recipe, navigate to Configuration > Recipes. On the Recipes page, under Hosting heading, select and run recipe Quick Start: Tenant Registration Pages (No payments).
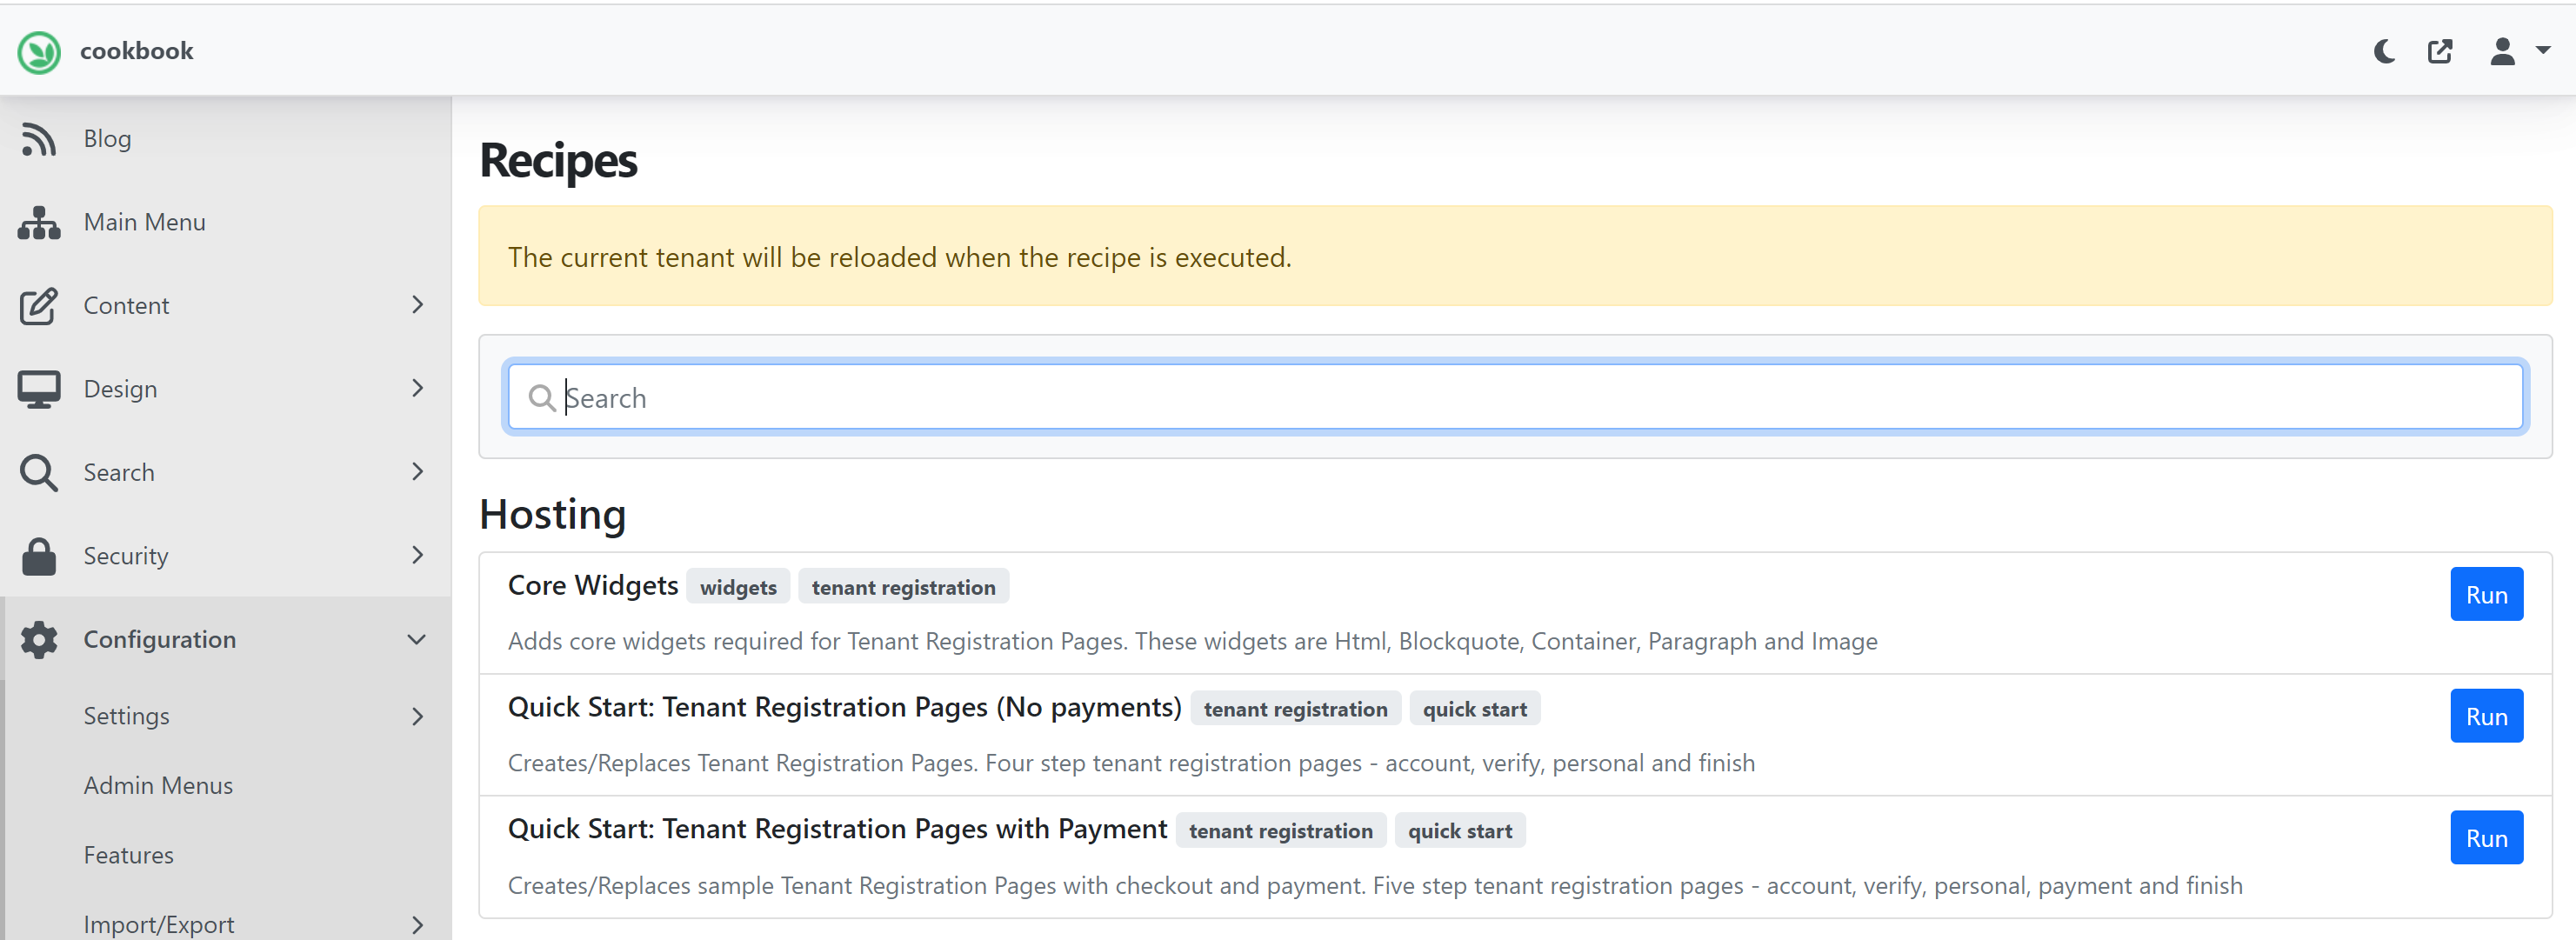
The successful execution of the recipe will create registration pages as below screenshot.
Missing Core widgets?
If your Default tenant is setup using SaaS recipe or any other setup recipe that dot not have core widgets content types like HTML, Liquid. Then you can create them by running recipe Core Widgets.
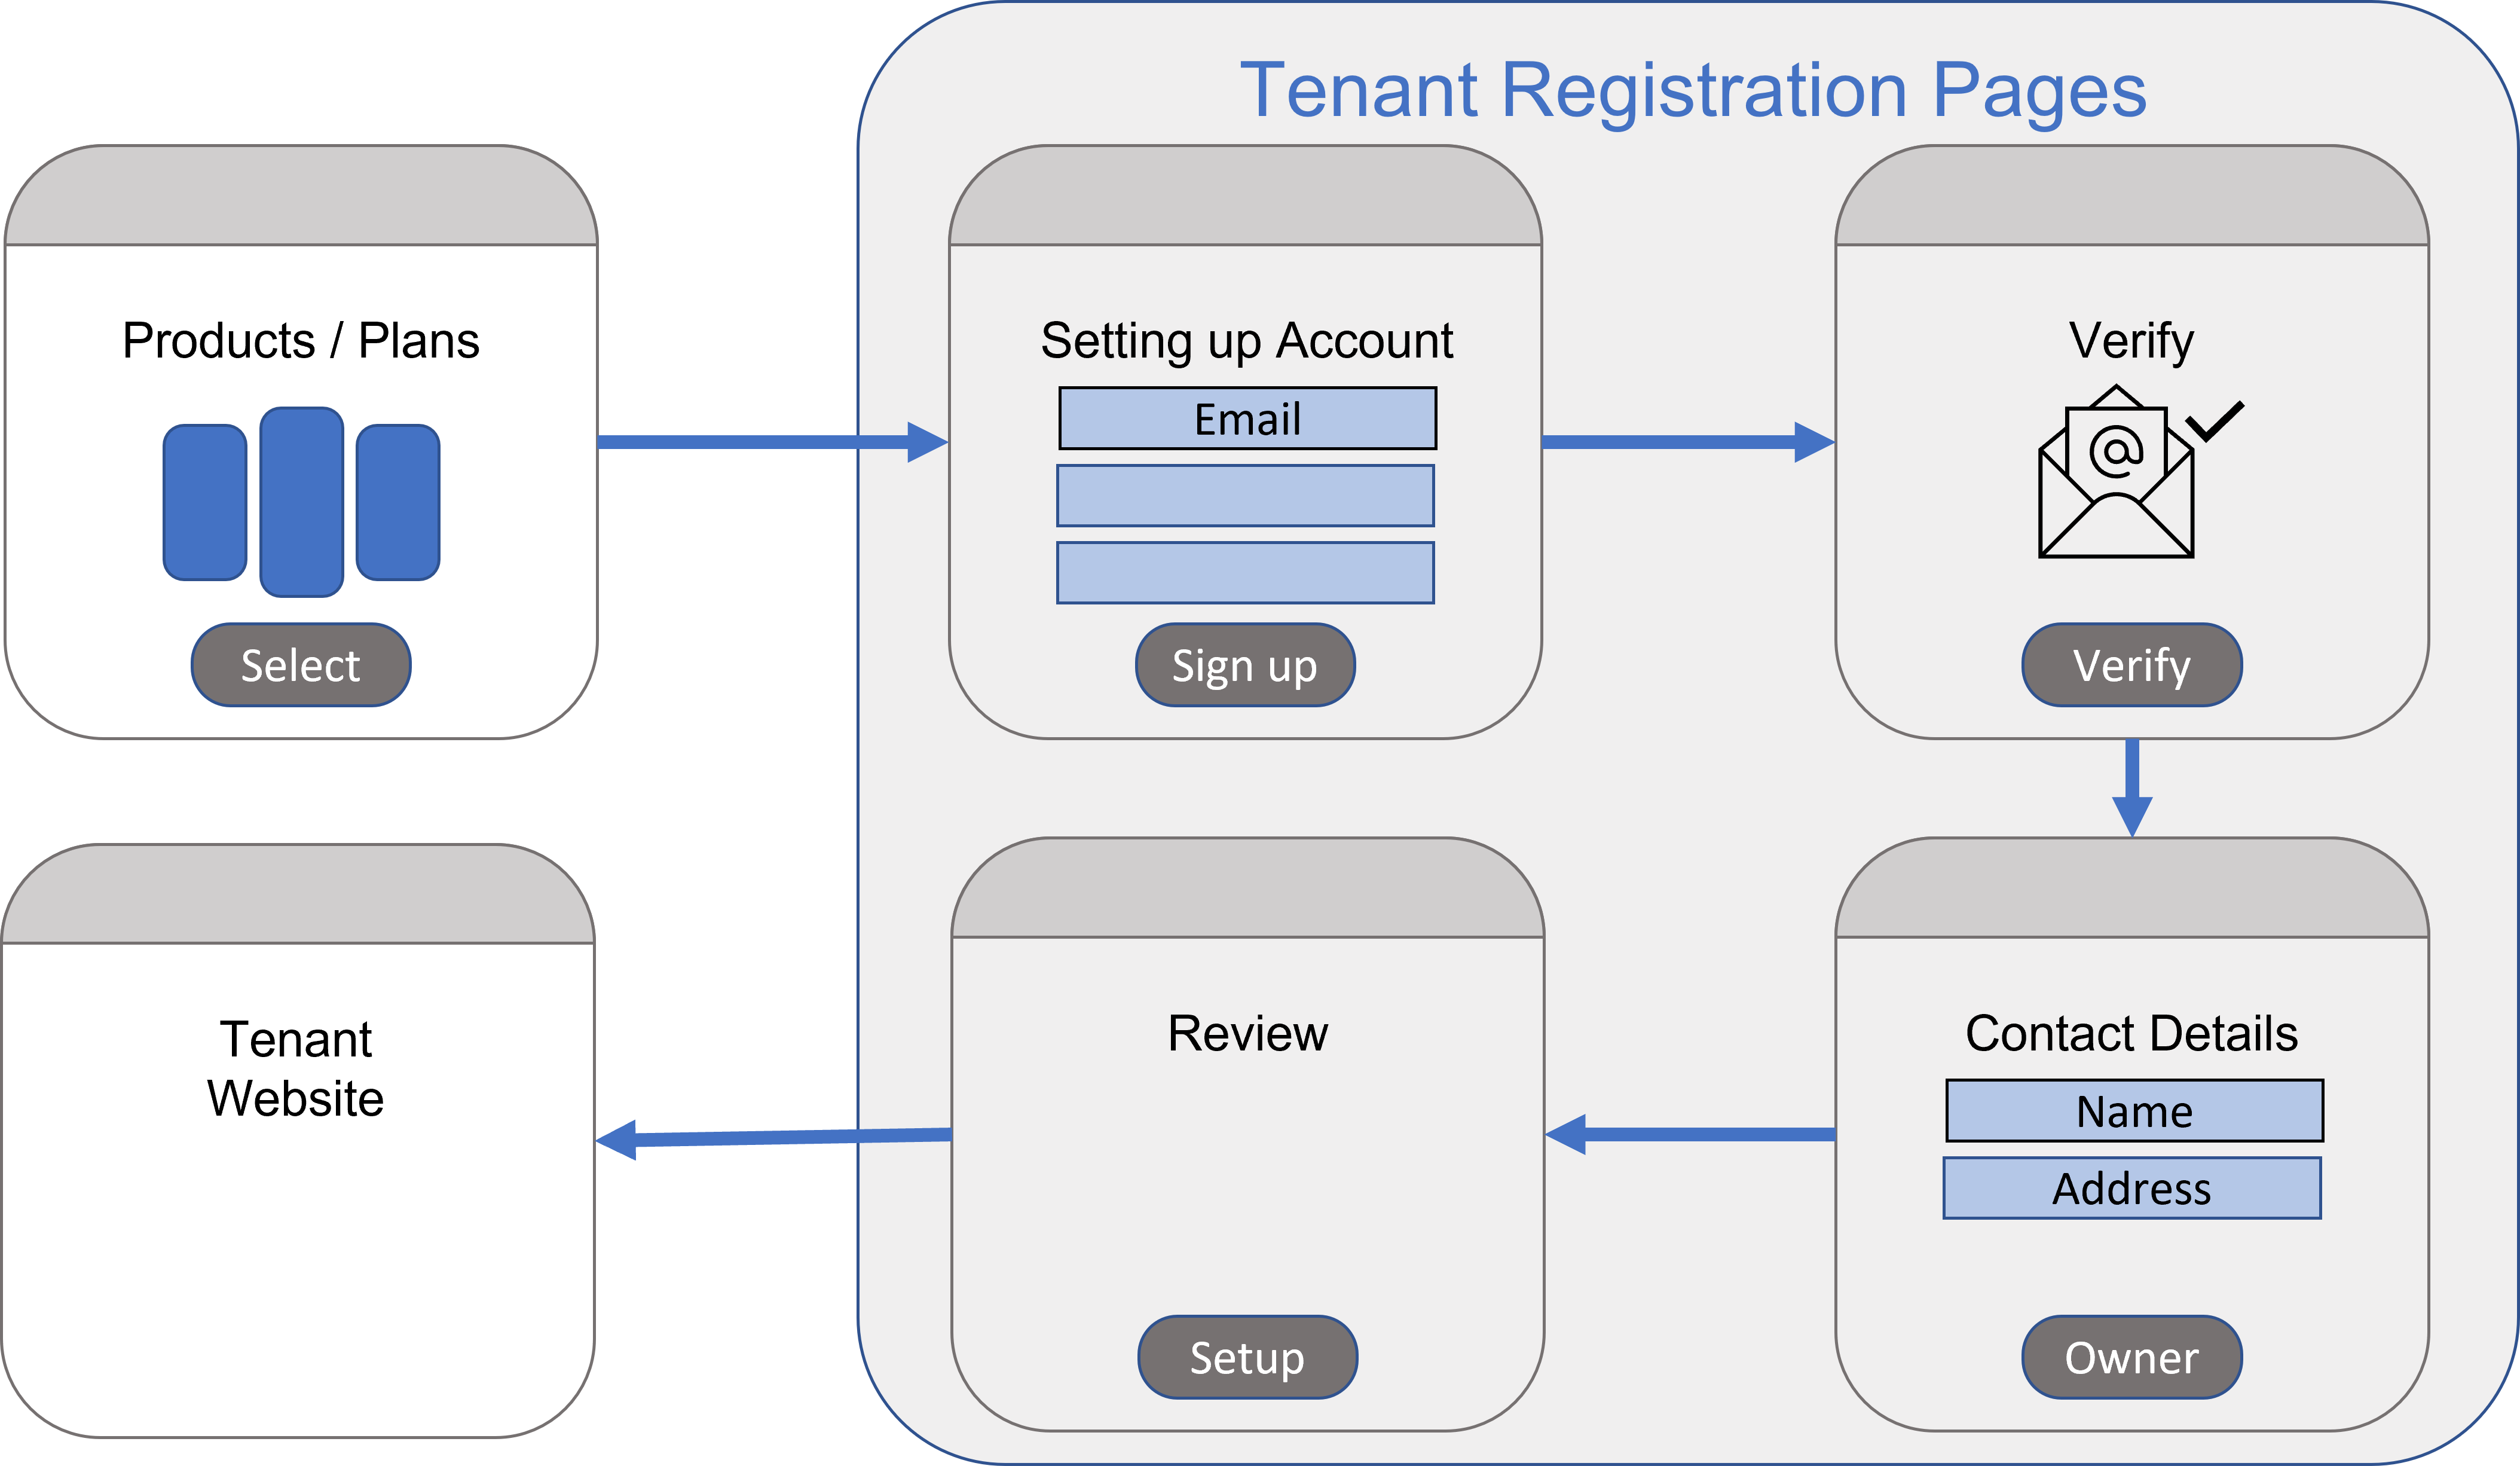
There are total four steps created by recipeQuick Start: Tenant Registration Pages (No payments). Each step provides customizable flow widgets. The registration steps can be customized by adding/removing widgets and/or adding/removing steps.
- Account
- Captures site details and admin credentials, admin's email and RecipeName from query string.
- Verify
- Verifies the email address provided in Account Step.(Note: This steps sends verification code via Email and requires that you have email settings are configured properly.)
- Personal
- Captures personal details like First Name, Last Name, Contact Details.
- Finish (Review)
- Review and Finish
More steps can be added by clicking (+) Icon or steps can be deleted to customize sign up flow.
Now, let's verify verify How end-user will sign-up by selecting a plan, follow sign-up process and provision their tenant.
While application is running, navigate to Pricing page, select the plan and follow signup process.

Congratulations! You have added tenant sign-up process in your website and tenant provisioning according to selected plan,
What's Next
Go to next section Design Tenant Billing.